
This fresh-baked, sweet and tart, Strawberry Rhubarb Slab Pie bursts with brightness. A seasonal favorite best served warm with a scoop of your favorite ice cream. Make it rich with an all-butter pie crust to give a delicate buttery taste and flaky bite.

As we approach the season of fruit pies, I couldn’t help snag some rhubarb along with fresh strawberries to get a head start in making a show-stopping slab pie!
Rhubarb has a very short season, generally from April to June. If you’re in a cooler climate, you may get lucky and see these pretty pink stalks into the summer months. However, because it’s not a common produce, when you see them in the market, grab some because the next time you go, they could be gone.
Strawberry rhubarb go hand-in-hand creating a beautiful blend of sweet and tart flavors in one; sweetness from the berries and tartness from the rhubarb. Some people have described rhubarb as having a sour taste. To avoid a sour flavor, use rhubarb with more pink flesh rather than green. Keep in mind, the leaves are toxic so you want to remove them. What happens if you don’t like tart flavors or there’s no rhubarb? Simply double the amount of strawberries or opt for a different berry in the same amount.

Stepping out of the norm by making a slab pie versus the standard round pie has been on my to-do list for as long as I can remember. The lattice work speaks volumes in making this country-rustic pie warm, welcoming and pleasing to the eye. The added floral touch of decor helps signify the season (as well as cover up any imperfections). What makes this pie even better, is using my homemade all-butter pie crust which gives a wonderful buttery flavor with an impeccable flaky crust!
How to Make a Strawberry Rhubarb Pie
Below are a few images with a short description of varying steps on the process of making a strawberry rhubarb slab pie. Use these images as a helpful guide when making your own. For detailed instructions, see the recipe card toward the bottom of this post and be sure to see the bulleted section below of a few important details to remember.


Important details to remember:
- FRESH IS BEST – I understand the ease of wanting to grab frozen fruit but when it comes to pies, we can’t risk the filling becoming soggy. Frozen fruits contain more liquid than fresh which is what we want to minimize so the filling can set properly.
- FIRM BERRIES – Overly ripened or soft berries naturally have more fruit juice. Use firm ripe berries so the filling can set properly and the texture of the filling has a solid yet tender bite that’s not too mushy.
- 60:40 RATIO – Because rhubarb has less juice than strawberries, a 60:40 ratio of rhubarb to strawberry is ideal.
- UNIFORM – When chopping and slicing strawberry rhubarb, aim for pieces that are 1 inch in size. This will help create even baking. Upon baking, if some pieces are small such as the size of a pea, they will break down nearing a liquid state whereas larger pieces will remain more intact.
- You do not have to cook the rhubarb beforehand.
- FILLING – Sugar pulls juice out of the fruit. Avoid adding sugar to the strawberry-rhubarb until ALL pie dough steps are complete. This includes lining the baking pan, cutting out lattice strips, braids, and any floral cut-outs.
- PATIENCE – As tempting as it may be to cut into a warm pie, it’s best to ensure it’s completely cooled to room temperature before cutting to allow juices to set and thicken.
- FREEZING – You can freeze the pie after it is baked, tightly covered and sealed for up to 3 months. Freezing the pie pre-baked is not recommended as it could pull out extra liquid from the filling and result in a mushy pie.
So there you have it, everything you need to know in making your next slab pie a success! If you make this pie, I’d love to know your thoughts. Feel free to leave a comment below.

Recommended Products for this Recipe


URBAN BAKES is a participant in the Amazon Services LLC Influencer Program, an influencer/affiliate advertising program designed to provide a means for us to earn (at no additional cost to you) by linking to https://amazon.com/shop/urbanbakes. Note that links advertised are products and/or services we’ve used, enjoyed, and want to share with you. Thank you for shopping and supporting URBAN BAKES!

If you enjoyed this recipe, consider commenting & rating below. I love to see your feedback and help answer any questions. Don’t forget to check below for related recipes.
Print
Strawberry Rhubarb Slab Pie
- Total Time: 6 hours
- Yield: 9x13 inch pie 1x
- Diet: Vegetarian
Description
This fresh-baked, sweet and tart, Strawberry Rhubarb Slab Pie bursts with brightness. A seasonal favorite best served warm with a scoop of your favorite ice cream. Make it rich with an all-butter pie crust to give a delicate buttery taste and flaky bite.
Ingredients
DOUBLE ALL-BUTTER PIE CRUST
- 3 cups (380 grams) all-purpose flour
- 2 teaspoons (10 grams) granulated sugar
- 1/2 teaspoon salt
- 1 cup (226 grams) unsalted cold butter, sliced or cut in 1 cm cubes
- 2 large egg yolks (30 grams)
- 8 to 10 tablespoons (120 to 150 grams) cold water
- 2 tablespoons (30 grams) heavy cream or milk
- 1 tablespoon (10 grams) coarse sugar (turbinado or demerara)
STRAWBERRY RHUBARB FILLING
- 4 1/2 cups (513 grams) rhubarb, sliced to 1/2 in (1.3 cm) thick
- 3 1/2 cups (462 grams) fresh strawberries, hulled and chopped
- 1/2 cup (100 grams) granulated sugar
- 1/3 cup (73 grams) light brown sugar
- 1/4 cup (32 grams) cornstarch
- 1/4 teaspoon salt
- 1 tablespoon (16 grams) fresh lemon juice
- 1 teaspoon fresh lemon zest
- 1/2 teaspoon vanilla bean paste or pure vanilla extract
- 2 tablespoons (28 grams) unsalted butter, cold and cut into small cubes
EQUIPMENT
9×13 inch (23×33 cm) baking pan
Instructions
- CRUST: In a medium bowl, whisk together flour, sugar and salt. Toss in butter and coat with flour mixture. Using a pastry blender or long-tined fork, cut in butter and egg yolk until the mixture becomes crumbly about the size of small peas. Add water 2 tablespoons (30 grams) at a time and continue to cut into the flour mixture until a ball of dough begins to form and is able to leave the sides of the bowl.
- Divide pastry dough into 2 parts. One part being about 3/4 of the dough, leaving the remaining part about 1/4 of the dough. The larger portion will be the bottom crust whereas, the smaller portion will be the lattice crust.
- Shape the 2 portions of dough into flattened disks. Cover tightly with plastic wrap and allow to chill in the refrigerator for up to an hour.
- Once the pastry dough has chilled, lightly flour a clean and dry surface. Heat oven to 400°F (205°C). Beginning with the larger portioned dough, use a rolling pin to roll out dough to a minimum of a 11×15 inch (28×38 cm) rectangle about 1/4 inch (1/2 cm) thick. With the aid of a large bench scraper or rolling pin, transfer the sheet of pastry dough onto a 9×13 inch (23×33 cm) rimmed baking pan. Gently press dough onto the bottom and up the sides of the pan. Using scissors, trim any overhang of excess dough to about 1/2 inch (1.3 cm) beyond the lip of the rimmed baking pan; lightly cover and set aside in the fridge.
- Add any scrapes to the smaller portion of the pastry dough and roll out to about 1/4 inch (1/2 cm) thick. Using a pastry wheel cutter or knife, cut out strips 1 inch (2.5 cm) wide of three different lengths: two 14-inch (35.5 cm) strips, six 10-inch (25 cm) strips, and four 4-inch (10 cm) strips. To make 2 braids, cut out six 10-inch (25 cm) strips that are 1/4-inch (1/2 cm) wide. Using any remaining pastry dough, cut out flowers and leaves. Place each strip and cut-out pieces of dough onto a large baking sheet or plate, lightly cover, and allow it to rest in the fridge while preparing the filling.
- FILLING: In a large bowl, mix rhubarb, strawberries, granulated sugar, brown sugar, cornstarch, salt, lemon juice, zest, and vanilla. Place fruit filling into the pastry-lined baking pan. Arrange cubed butter over the filling. Note: If there is too much juice pooled at the bottom of the bowl, do not discard as this contains the cornstarch needed to thicken the filling; follow step 7. If not, you may skip step 7.
- In a small pot over medium-high heat, reduce the juice until it begins to thicken. Use a rubber spatula to continuously stir to feel when it has thickened. Timing can vary depending on how much juice was released from the fruit. Remove thickened juice from heat and pour over the fruit filling.
- ASSEMBLY: Remove lattice strips from the fridge. Begin by laying the longest strip over the filling stretching diagonally across the longest part of the pan. Separate strips at least 1 inch (2.5 cm) apart. When laying strips perpendicular to the others, gently pull back every other strip to lay the cross-strip down. Flip back the top strips to complete that portion of the lattice design. Repeat this process for the remaining cross-strips.
- Trim any overhang of excess dough to about 1/2 inch (1.3 cm) beyond the lip of the rimmed baking pan and seal together with the dough used to layer the bottom of the pan. For a cleaner finish, tuck the excess dough underneath to create a rim. Place any cut-outs of dough around the perimeter of the unbaked pie. This would be a good time to cover any spots that may show imperfections.
- Using a pastry brush, brush the edges, each strip and cut-outs with heavy cream. Generously sprinkle with coarse sugar.
- Bake for 40 to 50 minutes on the center rack or until the fruit begins to bubble and crust is golden brown. Note: About 30 minutes into baking, use a sheet of aluminum foil to loosely cover areas of the pie that are browning too quickly to prevent burning.
- Remove the slab pie from the oven and allow it to cool over a wire rack till room temperature. For best results, pie can be left out overnight, lightly covered, and sliced the next day. Serve with ice cream and ENJOY!
- Prep Time: 1 hour
- Cooling Time: 4 hours
- Cook Time: 50 minutes
- Category: Pie
- Cuisine: American
Spring & Summer Pie Recipes


LATEST POSTS
- Bourbon Caramel Pumpkin Cake
 Between the cake layers of this deliciously spiced pumpkin cake with browned butter frosting is an easy-to-make luscious bourbon caramel giving each bite a rich creamy flavor. Top the cake with piped pumpkins made with frosting in varying colors to relish in the fall season.
- Maple Walnut Cupcakes
 Imagine biting into a stack of fluffy buttery pancakes with toasted walnuts, but as dessert! These Maple Walnut Cupcakes would be close enough to having that pancake breakfast. The tender crumb is sweetened with 100% pure maple, chopped walnuts, and topped with a luscious maple walnut buttercream.
- Peach Frangipane Tart
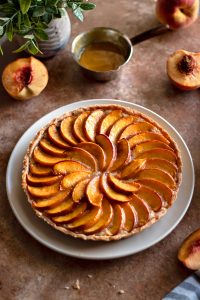 Making a Peach Frangipane Tart is much easier than it sounds. Fresh peach slices are beautifully arranged over a creamy almond center (frangipane) and a layer of peach jam, all nestled within a buttery-rich and flaky crust. The tart is later finished with a glaze to add moisture and shine.
- Plum with Almond Oat Crisp
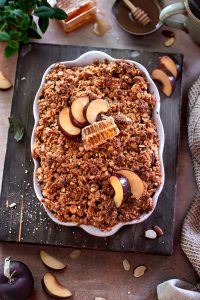 Juicy fresh plums rests beneath a spiced and buttery almond oat crisp. Add a touch of honey for an added sweet charm and serve warm with a scoop of ice cream for the ultimate experience of one of summer’s easiest desserts to make!